In the second chapter of Black Myth: Wukong, we will enter the desert area, where we will encounter many tiger bosses and learn the clone skill. Below, the editor will bring you a summary of the boss branch collection strategy for the second chapter, let’s take a look.
introduction:
The map of this chapter is a large-scale box garden, with multiple branching paths (there are multiple routes leading to the final BOSS). The following pictures and texts are the best plot experience routes found by the editor to the final BOSS. Players can experience the process according to the order below.
The picture and text contain hidden BOSS. Players who want to speed through can avoid the hidden BOSS.
After a battle with the Black Bear Demon, the Man of Destiny finally found the fragments of the Great Sage’s past power.
(Collecting fragments can unlock the root talent system in this game. This is another way to strengthen the development in the game, which will not be described here)
Back to the story of our second chapter, it starts with a folk song in northern Shaanxi dialect, and this line “That yellow-haired evil beast returns to his hometown” directly reveals the identity of the final boss to us, yes, it is the Yellow Wind Monster.
This chapter begins as the headless musician heals all our injuries.
Walk along the river at the beginning, turn right at the hillside, and at the end of this mountain path there is a high-quality wine shop – Lamb Brewing.
There are many shield soldiers and archers on the road. It is recommended to use the stealth method to sneak past them.
The best wine, which can be used to brew wine, has the effect of immediately restoring 20% of the current upper limit of life with each sip; and then slowly restoring 25% of life over a short period of time.
After picking up the key items, we continue to walk along the direction of the river. There are many frog monsters in the river. They are not threatening in themselves, but you must pay attention that after the frog dies, it will cause a range self-explosion and cause two damages, so you must avoid it as soon as possible after killing the frog monster.
After walking along the river to the end, turn left and go up the mountain, you will find a particle effect guiding us to the first Buddhist shrine (village entrance) in Shamen Village of this level to save it.
However, this ancestral hall is protected by a shield monster. The durability of the shield is displayed above its health bar. If players want to cause damage to it, besides using spells, they can only break the durability of the shield.
After our status is fully restored, we will look in the opposite direction of the ancestral hall and can see the entrance to Shamen Village.
There are a lot of ranged monsters in this scene, and players have no means to counter them except using stick flowers to knock down ranged attacks, so it is recommended to rush under the eaves at the entrance of Shamen Village first to avoid arrow attacks.
After killing the small fish at the entrance, go to the right side of the entrance to Sand Village. There is a gap on the wall to the right of Sand Village. We can enter the interior of Sand Village through this gap.
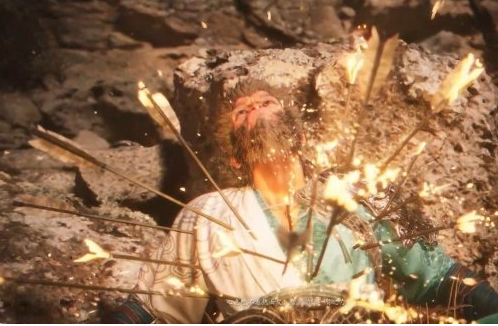
However, there is an elite monster on the right side of the sand village that requires extra attention. After death, this elite monster will directly perform a large-scale fire self-destruction, which has extremely high damage and can kill the player instantly, so you need to stay away from it as much as possible after the defeat.
After entering the village, we need to take a detour to find the back of the main gate of the village. Behind the main gate is the first boss of this level – the ground wolf
The attack module and actions of Dilang are almost the same as Lingxuzi, and his desire to attack is stronger, but he is actually not as strong as Lingxuzi in the first chapter.
After clearing out the ground wolves, we can return to the previous ancestral hall. There is not much else to explore at the entrance of Sand Village.
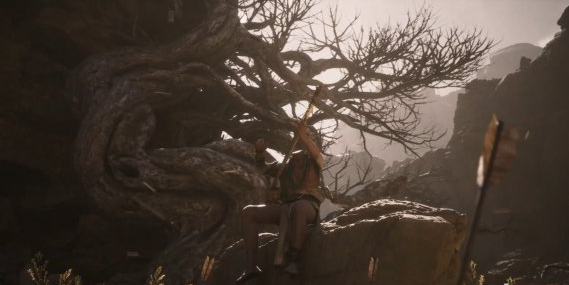
Then we jump down to the wooden bridge next to the shrine (at the entrance of the village), and walk downhill to see a small cave, where there is a key NPC Xu Gou (who can help us make elixirs, which can increase the player’s defense, strength or attack power.
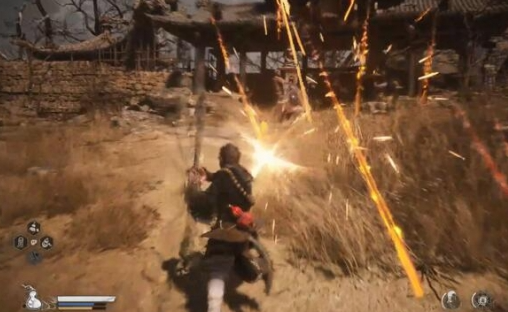
Here, Xu Gou will ask us for help to kill a fleeing monster named Langli Ge Bo. Compared with Boli Ge Lang in the first picture, it only has more health and its attack has thunder attribute. It is recommended that players hide on his side to output damage.
There will be three consecutive tongue hits from the front and a back kick from the back, neither of which are safe output positions. Secondly, it will release electric tadpoles that can track the player. In fact, it is very easy to crack and can be easily resolved by just jumping.
After cleaning up, we go back to find the dog. The dog will be very happy. After giving us some pills, he will also teach us how to make pills and open a shop for making pills (you need to go to the dog to buy them).

From the cave where the dog is, find a staircase that leads up and walk along it.
Then you can see a space guarded by several monsters, and on the right there is a closed door.
After clearing the monsters quickly, open the door and enter the first two-player boss of this game – the father and son of the King of Sand (actually, if you kill Sha Erlang, the King of Sand will retreat immediately, so we just need to focus on Sha Erlang)
After clearing this boss battle, you can interact with the Buddhist shrine next to it (Buji Valley), save it, and continue to go deeper along the cave next to the ancestral hall.
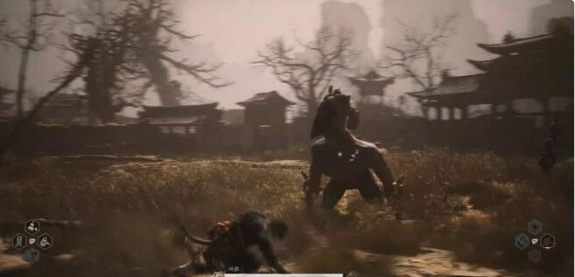
When you are halfway there, the next boss animation will be triggered. It is King Sha who has returned with his eldest son Sha Dalang.
There isn’t much to say about the beast form boss. Although its attacks are high, they are very powerful and easy to dodge, so just deal with them calmly.
PS: The important collection item Flying Dragon Scale is also here. On the right side of the Sha Dalang boss battle scene, there is a wall made up of countless small Buddha statues. The important item Dragon Scale is hidden inside. There are two ways to open it.
1. Change the spirit into a ghost, and use the ghost’s kowtow attack to break down the Buddha wall. If successful, there will be a vertical crack in the middle of the Buddha wall.
2. Lure Sha Dalang to attack the Buddha wall. For example, you can also break open the wall by using collision.
After killing Sha Dalang, continue to walk around the hillside in the cave. After bypassing two skinny goblins, go deeper and you will find a gap in the cave. Go in and you will find a flying bat beast standing on the ceiling. Kill it and walk out of the door of the room to enter the boss room of the first demon king level in this chapter – Tiger Vanguard. (Crouching Tiger Temple)
Tiger Vanguard is a more difficult BOSS in the second round. He has a fast attack speed and strong desire. He is known as “three punches to shatter the Monkey King’s dream”. Players need to stay focused at all times when fighting him.
After defeating the Tiger Vanguard, our old friend the Headless Monk will appear again. After he plays the balalaika and sings, he gives us a new spell “Copper Head and Iron Arms”. This skill can turn one’s body into gold and stone in a short period of time to resist attacks, that is, to parry.
And obtained the important item “Tiger’s Edge” in the second chapter.
Next we will find a mechanism on the Buddha platform in front. We go up and trigger it and find that we are still missing a key item “Stone Sharp”. The headless monk will remind us in the dark. Next we have to look for this item (Note: we will come back here later to open the hidden passage).
Walk behind the stone Buddha, there will be a road leading to a new area. Keep going along the mountain road. There will be some monsters harassing you on the way, and then we will encounter the next shrine (Dingfeng Bridge).
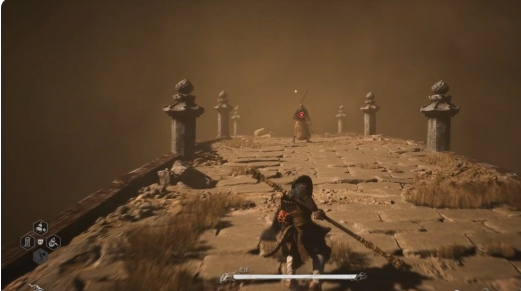
There is a stone bridge ahead. Be careful of the shield-holding monsters on the bridge. Their defense and damage are good. After passing through, we continue to head towards the deserted village inside. There are many zombies during the journey. Be careful not to be ambushed by them. In front of the gate in the picture below, you will see three “Rat Guards” standing at the gate. This elite monster has a fast attack speed. It is recommended that players focus their fire to kill them one by one. After defeating the “Rat Guards”, you will obtain their spirit.
There is a stone bridge ahead. Be careful of the shield-holding monsters on the bridge. Their defense and damage are good. After passing through, we continue to head towards the deserted village inside. There are many zombies during the journey. Be careful not to be ambushed by them. In front of the gate in the picture below, you will see three “Rat Guards” standing at the gate. This elite monster has a fast attack speed. It is recommended that players focus their fire to kill them one by one. After defeating the “Rat Guards”, you will obtain their spirit.
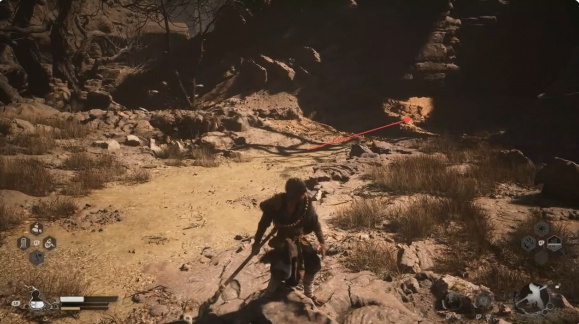
Continue forward from Dingfeng Manor. There will be sporadic attacks from small monsters along the way. Follow the road to a bridge, where we will encounter an elite monster “Tiger’s Minion” standing at the head of the bridge. We have to defeat him if we want to pass (Note: Tiger’s Minion’s attack will knock the “Destiny Man” off the bridge and kill him). After defeating him, we will obtain the important item “Old Rattle”.
Go forward into a cave, where there are monsters such as flying bats, and you can also pick up the rare “Glass Relic Bottle”. After exiting the cave, we will immediately meet the second demon king “Shi Xianfeng” in the second chapter.
Go forward into a cave, where there are monsters such as flying bats, and you can also pick up the rare “Glass Relic Bottle”. After exiting the cave, we will immediately meet the second demon king “Shi Xianfeng” in the second chapter.
PS: There is also a road on the right side of Shi Xianfeng, leading to a new area, Soul-Holding Cliff. This area is the location of some hidden BOSSes including Xiao Lilong (the content of the hidden BOSSes is reflected in the video guide, and the graphic guide is mainly based on the main line process, so the editor will not go into details about this area).
PS: There is also a road on the right side of Shi Xianfeng, leading to a new area, Soul-Holding Cliff. This area is the location of some hidden BOSSes including Xiao Lilong (the content of the hidden BOSSes is reflected in the video guide, and the graphic guide is mainly based on the main line process, so the editor will not go into details about this area).
PS: There is also a road on the right side of Shi Xianfeng, leading to a new area, Soul-Holding Cliff. This area is the location of some hidden BOSSes including Xiao Lilong (the content of the hidden BOSSes is reflected in the video guide, and the graphic guide is mainly based on the main line process, so the editor will not go into details about this area).
Slide all the way to reach and open the new Buddhist shrine “Zhenfeng Gate” (this road is a branch road leading to the final boss). In front of Zhenfeng Gate, there is a mechanism similar to the one in Crouching Tiger Temple, which can be opened with “Tiger’s Edge” and “Stone’s Sharpness”. Behind this door is the road to the final boss.
Of course, we don’t need to rush now. There is a road on the left side of the shrine. We will continue to move forward. Going up, we will encounter a new elite monster “Hundred Eyes Zhenren”. There is also a collection item “Luojia Fragrance Vine” here.
The path leading to the final boss is now complete.
Next, we will introduce another route. Teleport back to the “Crouching Tiger Temple” and return to the stone Buddha mechanism where you fought with the Tiger Vanguard. Use the two key props obtained above to open the hidden road. At this time, a “tiger head” will rise in the blood pool, and the tiger’s mouth is the new route.
After entering the tiger’s mouth, you can pick up the “Green Lotus Immortal Pill” inside. Continue walking inside. There is a small door. After entering, there are three raccoon cat monsters with essence. After defeating them, you can move forward.
At this time we will meet our old friend the Headless Monk again. His words imply that if we go forward we will meet the final BOSS “Yellow Wind Great Sage”, so here he teaches us a new spell “Body Out-of-Body Technique” (the monkey’s clone technique).
After a rest, we walked down and found that this was a crossroad. On the left was the edge of the Yellow Wind Formation. The gate directly in front was the Zhenfeng Gate (branch road) mentioned above. At the end of the road on the right, there was a cushion where we could sit.
When we enter the Yellow Wind Formation, we can encounter the final BOSS of this episode, “Yellow Wind Great Sage”. He is holding a Buddha’s head in his left hand and a three-pronged steel fork in his right hand. He is causing trouble in this Yellow Wind Ridge. What we have to do is to eradicate this scourge.
As the Great Sage Yellow Wind was defeated by our Tianming Man, the Headless Monk appeared again to clarify the story context of this chapter. It turned out that the Yellow Wind Monster had taken away the Great Sage’s roots, and also betrayed his teacher and ancestors by cutting off the head of Lingji Bodhisattva, and used the head as a container for the Great Sage’s roots.
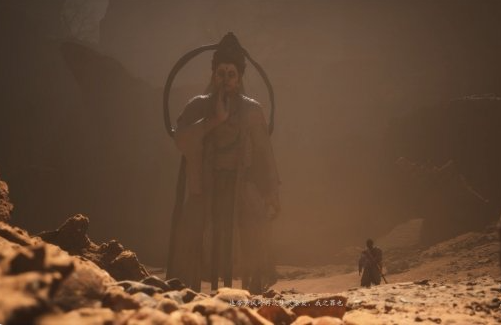
The headless monk held up the head. His identity was clear at this point. It turned out that he was the master of the rat demon, Lingji Bodhisattva. He thanked us for our destiny and gave us the great sage’s ability, the ear-hearing wrath. The second chapter ends.
The headless monk held up the head. His identity was clear at this point. It turned out that he was the master of the rat demon, Lingji Bodhisattva. He thanked us for our destiny and gave us the great sage’s ability, the ear-hearing wrath. The second chapter ends.
The above is a summary of the boss side quest collection strategy for Chapter 2 of Black Myth: Wukong. There is more content in the second round, so be careful not to miss any side quests.